Why Your EV Charger Keeps Tripping the Breaker
EV charging has gotten complicated with all the conflicting advice flying around. And when your charger starts tripping the breaker at 11 p.m., the last thing you want is a 3,000-word article that buries the fix on page two.
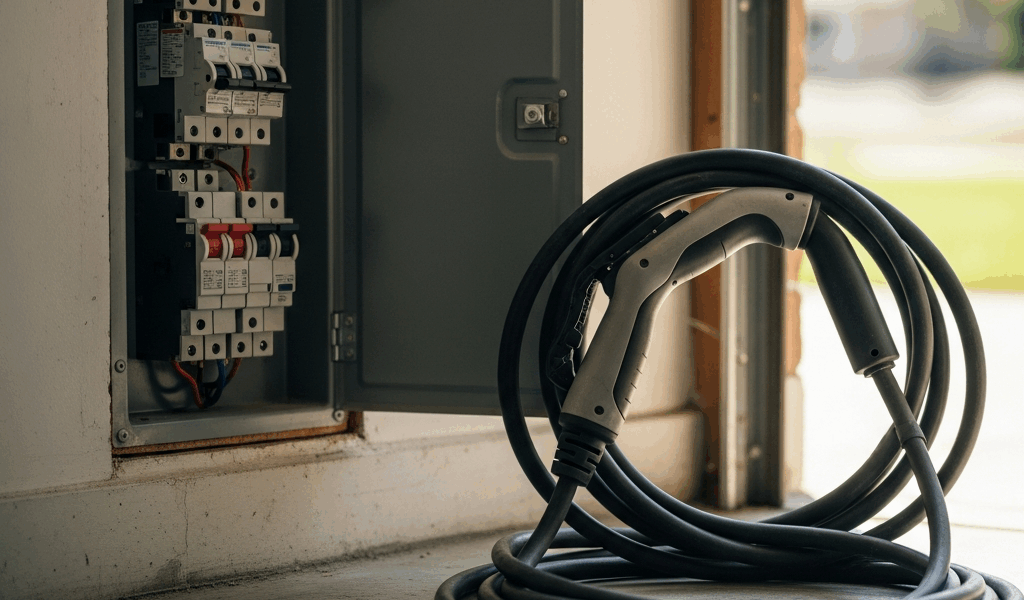
Your Level 2 charger was fine for months. Then one morning you walk out to the garage and your car’s sitting at 20%. Breaker’s off. Again.
I’ve been through this with three different charger setups across two houses, and I learned more about residential electrical panels than I ever intended to. Today, I’ll share it all with you — in the order that actually saves you money.
The short version: EV charger tripping the breaker at home comes down to three things. Your charger is pulling more amps than the breaker can sustain. The breaker itself is aging out. Or — and most guides skip this entirely — your charger shipped from the factory set higher than your circuit can handle long-term. Start with the cheapest fix first.
So, without further ado, let’s dive in.
Step 1 — Check Your Charger’s Amp Setting First
Most Level 2 chargers arrive set to maximum amperage. A ChargePoint Home Flex defaults to 48 amps out of the box. A Grizzl-E Pro comes set to 40 amps. Tesla Wall Connectors pull 48 amps unless you configure them otherwise.
That’s not a suggestion. That’s just the factory default — and it’s almost never the right setting for an average home circuit.
Electrical code is pretty clear here: breakers handling continuous loads shouldn’t exceed 80% of their rated capacity. A 50-amp breaker shouldn’t sustain anything above 40 amps for hours at a stretch. A 60-amp breaker tops out at 48 amps continuously. Run above those thresholds night after night and the breaker will eventually say no — usually at the worst possible time.
Lowering your charger’s amperage takes five minutes. Costs nothing. That’s what makes it the obvious first move.
For ChargePoint units, open the mobile app, go into settings, and dial the amperage down. I start at 32 amps. Leave it there for a week. If the breaker holds, you’ve found your answer.
Grizzl-E chargers use physical dip switches on the back of the unit — you’ll need a small flathead. Flip switches 1 and 2 to hit 32 amps, or check the manual for your exact target. Keep that manual. Seriously, tape it to the inside of your panel box if you have to.
Tesla Wall Connectors have a browser-based setup page. Log in through your local network, find the amperage limit field, and set it to 32 amps as a baseline.
Run two weeks at that reduced setting. If the tripping stops, you’re done. You can inch it back up in 4-amp increments if you want faster charging — but honestly? At 32 amps overnight, most EVs hit 100% before you wake up. Your breaker stays happy. Your car’s always full. That’s a fine place to stop.
Step 2 — Inspect the Breaker Itself
Probably should have opened with this section, honestly — but amp settings cost nothing to fix, so they go first.
Not every breaker trip means you’re pulling too much power. Sometimes the breaker is just done.
A failing breaker gives itself away. It trips the moment you reset it, even under light load. It feels warm — sometimes genuinely hot — when you press your hand near the panel. It resets mushy, like there’s no satisfying click. Any one of those signs means the breaker is worn out and needs to come out.
Breakers age. The internal spring loses tension. I’m apparently someone with a 1998 Square D panel and that brand works for me, while the original Zinsco breakers in my previous house never lasted past year 22 without nuisance-tripping. A breaker that handled 40 amps reliably for two decades might start failing at 35 in year 25. Don’t make my mistake of assuming age equals reliability.
But what is a nuisance trip? In essence, it’s when a breaker interrupts a circuit without a real fault present. But it’s much more than that — it’s a sign something in the system is mismatched, worn, or incompatible.
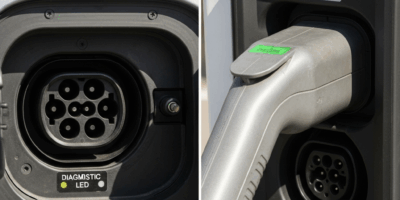
AFCI and GFCI breakers add another wrinkle. These safety devices trip more easily by design — they’re supposed to catch faults before they cause fires or shocks. But certain EV chargers trigger false trips on GFCI-equipped breakers. Older Clipper Creek units had a known issue with this. Some Tesla Wall Connectors do too, depending on panel type and grounding configuration.
The tell: your electrician’s meter shows no actual ground fault, but the breaker still trips consistently. Your other devices on that GFCI circuit work without issue. The problem appeared the day you added the charger.
Breaker replacement runs $150–$300 in most Pacific Northwest markets. If your panel is running 20-year-old breakers and you’re adding a high-load device, swapping in a quality replacement is cheap insurance — probably the cheapest line item in this whole situation.
Step 3 — Check the Wiring and Outlet Connections
Loose connections create heat. Heat triggers trips. This happens more than most homeowners expect — especially with NEMA 14-50 outlets, which are everywhere in Pacific Northwest garages for plug-in charging setups.
A loose connection at a 14-50 outlet has a specific pattern. The charger works fine for 45 minutes, then trips around the 90-minute mark when sustained draw generates enough heat to push the thermal protection. Touch the outlet cover — if it’s warm enough to be uncomfortable, that’s your sign. Look for any brown or black discoloration around the face of the outlet or inside the socket itself.
Here’s what you can safely check yourself: breaker off, charger unplugged, look at the outlet. Do the prongs seat firmly or wiggle? Is there any scorch marks around the edges? Any discoloration on the plug’s blades after you pull it? Those answers cost you nothing and tell you whether to call an electrician or keep looking.
Don’t open the panel. That’s the line. Checking an outlet face and a plug connection — fine. Reaching into a live panel — not fine.
If the outlet looks clean but trips continue, a loose connection at the breaker terminal inside the panel is next on the list. That’s electrician territory. Diagnosis and tightening usually runs $200–$400 depending on your area and how long it takes them to find the loose lug.
When You Actually Need an Electrician or Panel Upgrade
Frustrated by repeated trips even after dropping to 32 amps, a lot of homeowners in older Seattle and Portland neighborhoods eventually call an electrician — and find out the real problem was the panel the whole time. A 100-amp service panel, installed in 1987, was never designed to handle an electric water heater, an induction range, a heat pump, and a 40-amp EV circuit running simultaneously.
This new load reality took off several years ago and eventually evolved into the panel upgrade conversation electricians know and dread today — because nobody loves telling a homeowner it’ll cost $4,000 to fix their charging problem.
Your electrician can calculate your home’s total connected load in about 10 minutes. Every major appliance gets added up. If that total sits above 80–85% of your panel’s rated capacity, adding a high-draw EV charger isn’t a wiring problem. It’s a math problem.
A 100-amp to 200-amp panel upgrade runs $3,000–$5,000 in the Seattle-Portland corridor — sometimes higher depending on whether your utility requires a service entrance upgrade too. That’s real money. But Washington and Oregon both run EV charger installation rebates that can offset a significant chunk. Some local utilities cover 30–50% of panel upgrade costs when the work is tied to a charger installation. Check your utility’s EV incentive page before you get a quote — it changes what the electrician is actually bidding.
While you won’t need to become an electrician yourself, you will need a handful of specific answers before you call one: what charger model you have, what amperage it’s currently set to, how old your panel is, and whether the breaker shows any of the physical symptoms from Step 2. Walk in with that information and the diagnostic call goes faster — and shorter calls cost less.
Start with the amp setting. Check the breaker. Then call a licensed electrician if the trips keep coming. By that point you’ll have already ruled out the two cheapest fixes, and they’ll spend their time on what’s actually left.


Stay in the loop
Get the latest northwestevcharge.com updates delivered to your inbox.