Why Your EV Charger Stops Working After an Outage
EV charging has gotten complicated with all the misinformation flying around about what to do when things go wrong. As someone who stood in a cold garage at 7 a.m. staring at a dead Tesla Wall Connector the morning after a Pacific Northwest windstorm, I learned everything there is to know about this particular problem. Today, I will share it all with you.
Last November, a six-hour outage knocked out power across a wide stretch of the region. When the grid came back, my Wall Connector just — sat there. Breaker was on. Every other outlet in the house worked fine. The charger itself looked like it had simply forgotten how to exist. Turns out, that’s almost exactly what happened.
Here’s the actual mechanics of it: the charger’s internal computer loses its reference signal during an outage. The GFCI protection trips as a safety measure. The car and the charger lose what’s called their communication handshake — the back-and-forth signal that tells each device the other is safe and ready. In older homes, particularly in Seattle and Portland with aging panels, the main breaker can land in a partial fault state that a casual flip won’t clear. The charger isn’t dead. It’s locked in a protective mode, waiting on a reset signal nobody’s sent yet.
Most people fix this in under ten minutes. Most people also don’t know the right steps, so they flip the breaker twice, declare the unit deceased, and start Googling electricians at 9 p.m. on a Sunday. Don’t make my mistake.
Step 1 — Reset the Breaker the Right Way
I flipped mine off and immediately flipped it back on. Maybe two seconds elapsed. That does nothing — the internal fault latch hasn’t had time to clear, and you’re right back where you started.
The correct sequence is slower than you’d expect. Find your electrical panel. Look for the double-pole 240-volt breaker — it’ll be labeled something like “EV Charger” or “Wall Connector,” and it’s physically larger than your standard breakers. Flip it fully to OFF. Then wait. Thirty seconds minimum, sixty is better. This pause matters because the charger’s capacitors need time to discharge and the fault logic actually needs to cycle out completely.
After the full wait, switch it back to ON. Listen carefully. No clicking. No buzzing. If either happens, stop entirely and call a licensed electrician — that sound means a deeper electrical issue that a reset won’t fix.
Success is pretty obvious: the breaker holds, the charger makes a small sound or lights up, and the LED status indicator shows normal rather than fault. Plug in the car. Charging? You’re done. Not charging? Move to Step 2.
Step 2 — Reset Your Specific Charger
Probably should have opened with this section, honestly. Different hardware, different reset procedures — and a lot of people skip this entirely because they assume the breaker reset covered everything.
Tesla Wall Connector
There’s a small WiFi button on the front face of the unit, recessed slightly so you don’t hit it by accident. Press and hold it for five seconds. The LED strip will cycle through colors — usually amber first, then red, then a sequence of blinks. Once it settles back to steady green, the reset finished. Give it another 30 seconds before you try charging. If it lands on red and stays there, don’t keep pressing buttons. Run through the GFCI check in Step 3, then call Tesla Support if that doesn’t resolve it.
ChargePoint Home Flex
ChargePoint gives you two paths here. The faster one: open the ChargePoint app, find your Home Flex in the device list, tap Settings, select Factory Reset. The unit power cycles on its own — no tools, no crouching behind the charger. If the app isn’t available, there’s a small black reset button on the back of the housing. You’ll need a paperclip to reach it. Hold it for ten seconds. The LED blinks amber during the reset, then returns to steady blue or green once it’s finished and ready.
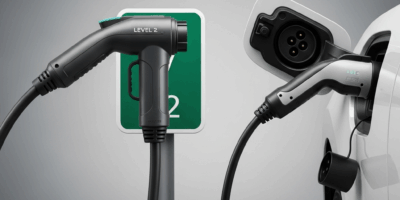
Grizzl-E (Level 2)
This one is almost aggressively simple. Unplug the Grizzl-E from the wall outlet. Wait 60 seconds. Plug it back in. That’s the whole procedure — no button sequences, no app, no paperclip required. Watch the LED cycle through its startup pattern and settle on a steady color. If it does that, it’s reset and ready. I’m apparently a hardware-over-software person and the Grizzl-E works for me while app-dependent resets never feel quite as reliable.
After whichever reset applies to your unit, plug in the vehicle. Car showing it’s charging? Problem solved. Still nothing? Step 3.
Step 3 — Check the GFCI and Your Home’s Wiring
But what is a GFCI? In essence, it’s a ground fault circuit interrupter — a safety device that cuts power the instant it detects a current imbalance suggesting electricity is taking an unintended path. But it’s much more than that in the context of EV charging, because it can trip completely independently of your main breaker during an outage, and most people don’t know to check it.
Finding yours takes about thirty seconds. Look at the wall outlet where your charger plugs in. See a small outlet with TEST and RESET buttons — typically one yellow, one black? That’s your GFCI outlet. Press RESET. If there’s no outlet-mounted GFCI and your charger is hardwired directly into the wall, you’re likely working with a GFCI breaker instead. Check your panel — it should be labeled near the main EV breaker. Same deal: press the RESET button on that breaker.
Garage and outdoor installations in the Pacific Northwest are especially prone to moisture-triggered GFCI trips after storms. Rain seeps into conduit. It gets into outdoor outlets. The GFCI detects a false fault and shuts down. That’s fine — that’s the device doing its job. What isn’t fine: resetting the GFCI and watching it trip again two minutes later. If that’s happening, stop. Repeated tripping after a reset means actual moisture intrusion or real wiring damage. Call a licensed electrician. Cycling through resets on a genuinely faulted GFCI isn’t a troubleshooting step — it’s a way to make a bad situation dangerous.
Still Not Charging — When to Call for Help
So, without further ado, let’s call this what it is: if Steps 1 through 3 didn’t fix it, the problem is either hardware failure or something wrong in the electrical system itself. Knowing which one matters before you spend money.
Hardware damage looks like this: the unit won’t power on at all after the breaker reset, there’s a burning smell near the charger — plastic or electrical — the display shows persistent error codes even after a full factory reset, or the car starts to charge and then cuts out within seconds. Any of those? The charger itself is the problem.
Signs you need a professional instead: the GFCI breaker trips repeatedly, other outlets on the same circuit are behaving strangely, the main breaker won’t hold, or there are scorch marks on the breaker. That last one especially — do not keep resetting a breaker with scorch marks on it.
For hardware support: Tesla Support is at 1-877-798-3752. ChargePoint is at 1-888-889-8265. Have your serial number and installation date ready before you call — they’ll ask. For Grizzl-E and other third-party units, the support number is in your documentation, usually on a card inside the original packaging.
If the manufacturer confirms the unit is dead under warranty, Washington and Oregon both have solid consumer protection rules covering installed electrical equipment. Most charger warranties include failures caused by grid surges and power anomalies — exactly what an outage event is. Pull together your outage date and any communication from your utility confirming the blackout. That documentation makes the warranty claim significantly easier to process.
When anything about the wiring, the GFCI behavior, or the panel feels unclear — call a local EV-certified electrician. A one-hour diagnostic runs $100 to $150. That’s a reasonable price to pay before you replace a $500+ charger that might have been a $0 fix all along.


Stay in the loop
Get the latest northwestevcharge.com updates delivered to your inbox.