What EV Charger Error Codes Are Actually Telling You
EV charging has gotten complicated with all the error codes and blinking lights flying around. As someone who installed a Level 2 charger in my garage three years ago — a ChargePoint Home Flex, 48-amp, hardwired into a brand-new 60-amp breaker — I learned everything there is to know about decoding these cryptic little messages. Today, I will share it all with you.
Here’s what nobody tells you upfront: most error codes aren’t your charger dying. They’re your charger doing exactly what it was designed to do — stopping a bad situation before it gets worse. That’s what makes these systems endearing to us EV owners, even when they’re inconvenient at 7 a.m. on a Monday.
Some codes clear in under an hour with zero tools. Some need a licensed electrician and a realistic budget conversation. The trick is knowing which is which. So, without further ado, let’s dive in.
Common Error Codes on Level 2 Home Chargers
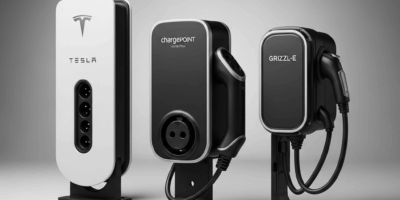
ChargePoint Home Flex — E1 (Ground Fault Detected)
This one stopped my charging cold on a Tuesday night in November. A ground fault means electricity is escaping toward ground through a path it shouldn’t — usually water intrusion, damaged wire insulation, or a corroded connector. ChargePoint’s E1 is its way of slamming the brakes before something expensive or dangerous happens.
What to do: Don’t DIY this one. Call a licensed electrician. They’ll trace the wiring, inspect your outlet box, and pull your breaker panel cover. Skipping this isn’t worth it — a neglected ground fault can fry your car’s onboard charger, and those repairs run $1,500 to $3,000 depending on make and model.
JuiceBox — ERR_PILOT (Pilot Signal Lost)
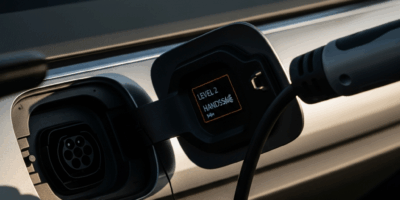
The pilot signal is the constant handshake between your charger and your car — a 1kHz signal that essentially says “I’m ready, are you?” When that connection drops mid-session or at startup, ERR_PILOT appears. Usually temporary. Usually annoying.
What to do: Unplug the J1772 connector from your car’s charge port. Wait 30 seconds — not five, actually thirty. Plug back in. If the error sticks around, peek inside your car’s charge port with a flashlight. Moisture and debris collect in there more than you’d think. Dry it with compressed air if needed. Still stuck after two or three resets? The charger’s internal pilot relay may be going bad. Contact JuiceBox support — units under warranty get replaced, not repaired.
Grizzl-E — FL (Over-Temperature Shutdown)
Your charger cooked itself. The FL code triggers when internal temps climb past safe operating limits — which happens faster than you’d expect when the unit is mounted on a south-facing wall in direct August sun while pulling 40 amps continuously. Grizzl-E shuts down rather than risk damage to the internal components.
What to do: Move it to shade if possible and let it sit for 30 minutes. Do not spray water on it to cool it down. Once the internals drop to normal range, the unit resumes charging automatically — no reset required. If you’re in Phoenix, Tucson, or anywhere the summer afternoon hits 105°F regularly, schedule your charging sessions for before 8 a.m. or after 8 p.m. FL codes basically disappear when you do that.
Emporia Vue — COM_ERROR (Communication Fault)
Your Emporia charger lost contact with its cloud servers or your home WiFi network. The actual charging function still works fine — the car will still charge — but you lose scheduling, energy monitoring, and remote control through the app.
What to do: First, check your WiFi signal at the charger’s physical location. Anything below -70 dBm is too weak. Restart the charger by flipping its breaker off for ten seconds and back on. Then open the Emporia app and walk through the WiFi reconnection flow — it takes about three minutes. If signal is the real culprit, a $35 WiFi extender placed halfway between your router and the garage solves it permanently. Works nine times out of ten, honestly.
Generic Level 2 Codes — 15A or 16A Display (Overcurrent)
The charger detected a current spike it wasn’t expecting — usually traced to a failing breaker, a loose lug connection inside the panel, or undersized wire that’s been quietly overheating for months.
What to do: Stop using the charger immediately. Don’t reset and retry. An electrician needs to inspect the breaker and every connection between the panel and the charger outlet. Overcurrent faults left unaddressed are a fire hazard — not a theoretical one. Electrician territory, full stop.
Error Codes Related to Your Home Electrical Setup
Probably should have opened with this section, honestly. A huge percentage of charger error codes have nothing to do with the charger itself. They’re your home’s electrical system waving a flag through the only device paying close enough attention to notice.
Voltage Drop Issues
Level 2 chargers want steady 240V nominal. When your home’s main panel is overloaded or your circuit wiring is undersized, voltage sags during heavy charging draws. The charger detects this, throttles down, and sometimes throws a fault code rather than continue on degraded power.
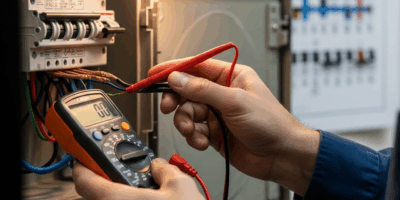
How to identify this: Watch for a pattern. Does the error code appear consistently between 7–10 a.m. or 5–9 p.m.? Do your lights dim slightly when the charging session starts? That’s voltage drop. Especially common in older homes — think 1960s and 1970s construction — running 100-amp main service panels that were never designed to carry a modern EV load on top of everything else.
What to do: An electrician assesses your panel capacity and measures actual voltage at the charger circuit under load. Sometimes the fix is upgrading your main service from 100A to 200A — budget $3,000 to $8,000 depending on your area and permit costs. Sometimes it’s just moving the charger circuit to the less-loaded phase of your panel, which runs $400 to $800. Get the assessment before assuming the worst.
Wrong Wire Gauge for Charger Amperage
A 40-amp charger circuit requires 8 AWG copper wire at minimum. Run it on 10 AWG — which is code-compliant for a 30-amp circuit but not a 40-amp one — and the wire overheats under sustained load. The charger detects abnormal resistance or temperature and faults out. It’s protecting you from a fire inside your wall.
How to identify this: Find your charger’s dedicated breaker in the panel. The breaker handle should be stamped with its amperage rating — 40, 50, whatever was installed. Now trace the wire entering the breaker. The insulation jacket is printed with the wire gauge every foot or so. If your 40-amp breaker has 10 AWG wire feeding it, you’ve found your problem.
What to do: An electrician re-runs the circuit with the correct gauge wire. Budget $300 to $600 in most markets. Not negotiable — wrong wire gauge is both a code violation and a legitimate fire risk.
Tripped Main Breaker or Double-Tap
A double-tap is when two separate circuits share one breaker slot in your panel. It’s a code violation, and it happens more often than it should — especially in older homes where previous owners did their own electrical work. I’m apparently the kind of person who discovers these things at 10 p.m. on a Sunday, and flipping the breaker back on works for me while just resetting never actually solves it.
What to do: Reset the breaker once. If it trips again within seconds or minutes, stop there. Repeated resets on a tripping breaker can damage the breaker itself and create more problems. An electrician will pull a proper dedicated circuit and may recommend a panel upgrade if the box is genuinely out of capacity. Don’t make my mistake of resetting it four times in a row before accepting that something is actually wrong.
When the Error Code Points to Your Car, Not the Charger
Sometimes the charger is perfectly healthy and is simply reporting that the vehicle on the other end of the cable isn’t behaving. That’s an important distinction before you start troubleshooting hardware or calling electricians.
How to Tell the Difference
Unplug the charging connector from your car’s charge port. Does the error code clear off the charger’s display? If yes — if the charger goes back to its normal standby screen — the problem lives somewhere in your vehicle, not in the charging equipment. Borrow access to a different EV if you can. Plug your charger into that car. If it charges without issue, your car is the culprit.
Common Vehicle-Side Codes
- Charge port temperature fault: Your car’s port overheated — common after back-to-back DC fast charging sessions at a public station followed immediately by a home Level 2 session. Let the port cool for 30 minutes before trying again.
- Onboard charger failure: The actual charging hardware inside your vehicle has failed. This is a dealership visit and, depending on your model, a repair that can run $800 to $2,500 out of warranty.
- Battery management system error: Your car’s BMS has flagged something unusual in the battery pack. Check your dashboard and your vehicle’s companion app for additional codes. Don’t ignore BMS errors — they exist to prevent thermal events and long-term capacity loss.
When you call a charger installer for diagnosis, lead with the fact that you’ve already ruled out the charger by testing it with the connector unplugged. It saves 20 minutes of back-and-forth and gets them focused on what actually needs attention.
Steps to Clear an Error Code and Get Charging Again
Before calling anyone, run through this sequence. Takes about five minutes.
- Unplug from your car. Pull the J1772 connector firmly from the charge port. Wait a full 10 seconds before doing anything else.
- Power cycle the charger. Flip its dedicated breaker off. Count to 10. Flip it back on. The charger display should restart fresh — most units show a brief boot sequence.
- Check your home’s main breaker panel. Is everything in the ON position? Storms and power surges can trip breakers silently — no obvious sign until you go look.
- Open the charger app if your unit has one. JuiceBox and Emporia both have “Restart” or “Clear Fault” buttons inside their apps. Use them before assuming hardware failure.
- Do a quick physical inspection. Is the wall outlet box loose? Is the charging cable kinked, abraded, or showing exposed wire? Is there standing water anywhere near the unit? Fix what’s visible before proceeding.
- Plug back into your car and start a session. Watch the charger’s display and your car’s dashboard for the first 60 seconds. Errors that are going to return usually return immediately.
If the code comes back within seconds of reset, the underlying problem is still there — a reset didn’t fix anything, it just confirmed something is genuinely wrong. Time to call a licensed EV charger installer. If the code stays gone for several days, you most likely had a one-time fault from a power surge or a momentary bad connection. Keep an eye on it but don’t panic.
If you’ve worked through every step here and the error persists, contact a licensed EV charger installer in your area — not just a general electrician if you can help it, but someone who specifically works with EVSE equipment. They’ll run a proper diagnosis across your home electrical system, the charger hardware, and your vehicle’s charging interface, and give you a straight answer on what needs to change.

Stay in the loop
Get the latest northwestevcharge.com updates delivered to your inbox.